A bathroom plumbing diagram maps every supply line, drain, vent, and fixture connection before a single wall gets opened, and in Sedona that step matters more than most homeowners expect. Red-rock-area homes mix galvanized pipe, older copper, and newer PEX, often in the same bathroom, which makes guessing an expensive habit. This guide breaks down rough-in dimensions, DWV basics, and layout options so you can walk into a remodel conversation already speaking the contractor's language.
Bathroom Plumbing Rough-In Dimensions
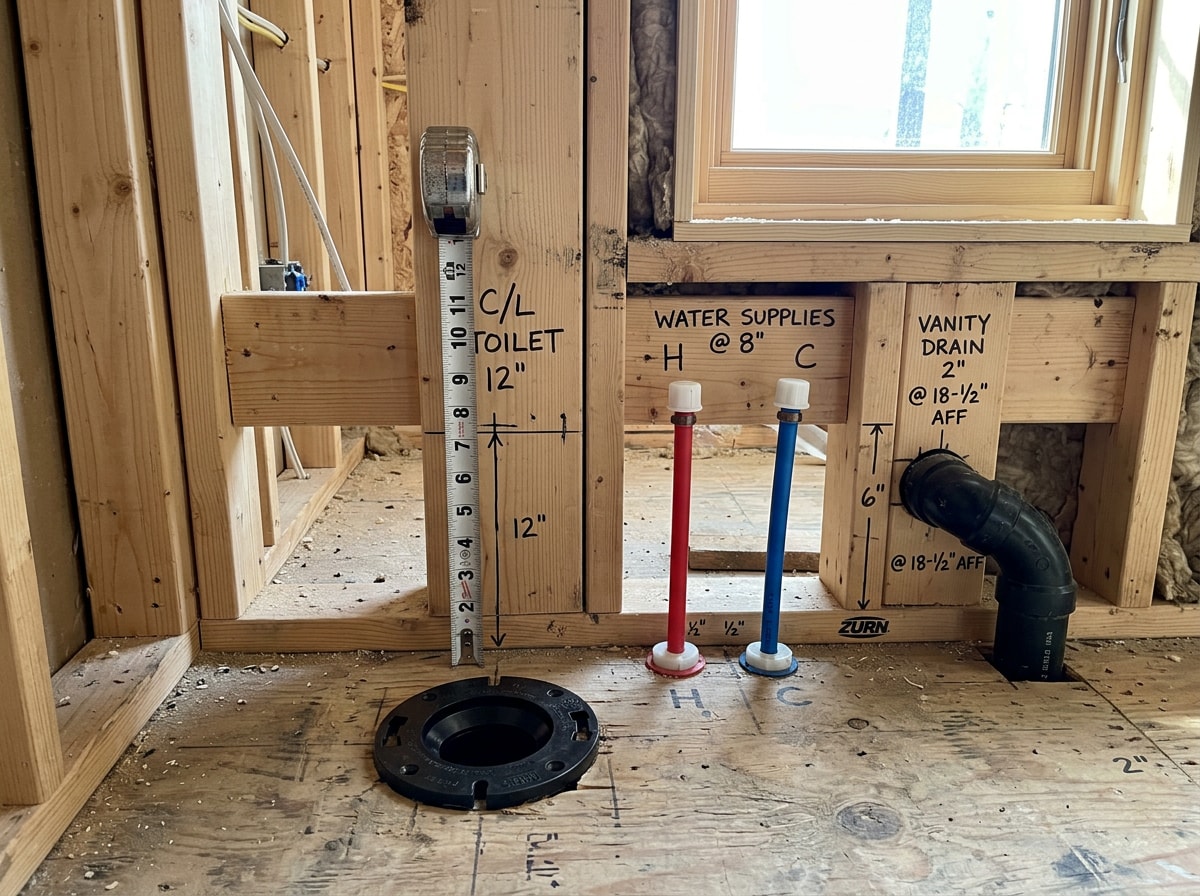
Rough-in dimensions are the numbers a diagram is built around, and they're usually the first thing a contractor checks before ordering fixtures. Get them wrong and you're opening finished walls twice.
| Fixture Point | Typical Dimension | Notes |
|---|---|---|
| Toilet flange (center to finished back wall) | 12 in. (standard); 10 in. in some older homes | Conventional rough-in, not a code minimum |
| Toilet side clearance | 15 in. minimum, centerline to any wall or fixture | Consistent across IPC and UPC |
| Toilet front clearance | 21 in. minimum clear floor space | Accessible/ADA installs require more |
| Sink drain height | 18–20 in. above finished floor | Measured to center of drain |
| Sink supply lines | ~21 in. above floor, 4 in. each side of drain centerline | Hot on left, cold on right |
| Shower drain | 2-in. pipe, centered in pan | Valve height varies by fixture, often 38–48 in. |
| Tub waste/overflow | 12–17 in. from finished wall | Confirm against the tub's spec sheet |
These are common industry starting points, not a substitute for your local code book. Sedona sits near the Yavapai–Coconino county line, so which plumbing code edition and local amendments apply can depend on exactly where your parcel falls. Confirm current figures with your permitting office before finalizing a diagram, and lean on the International Plumbing Code or Uniform Plumbing Code reference pages if you want to see how the two model codes differ.
What a Bathroom Plumbing Diagram Actually Shows
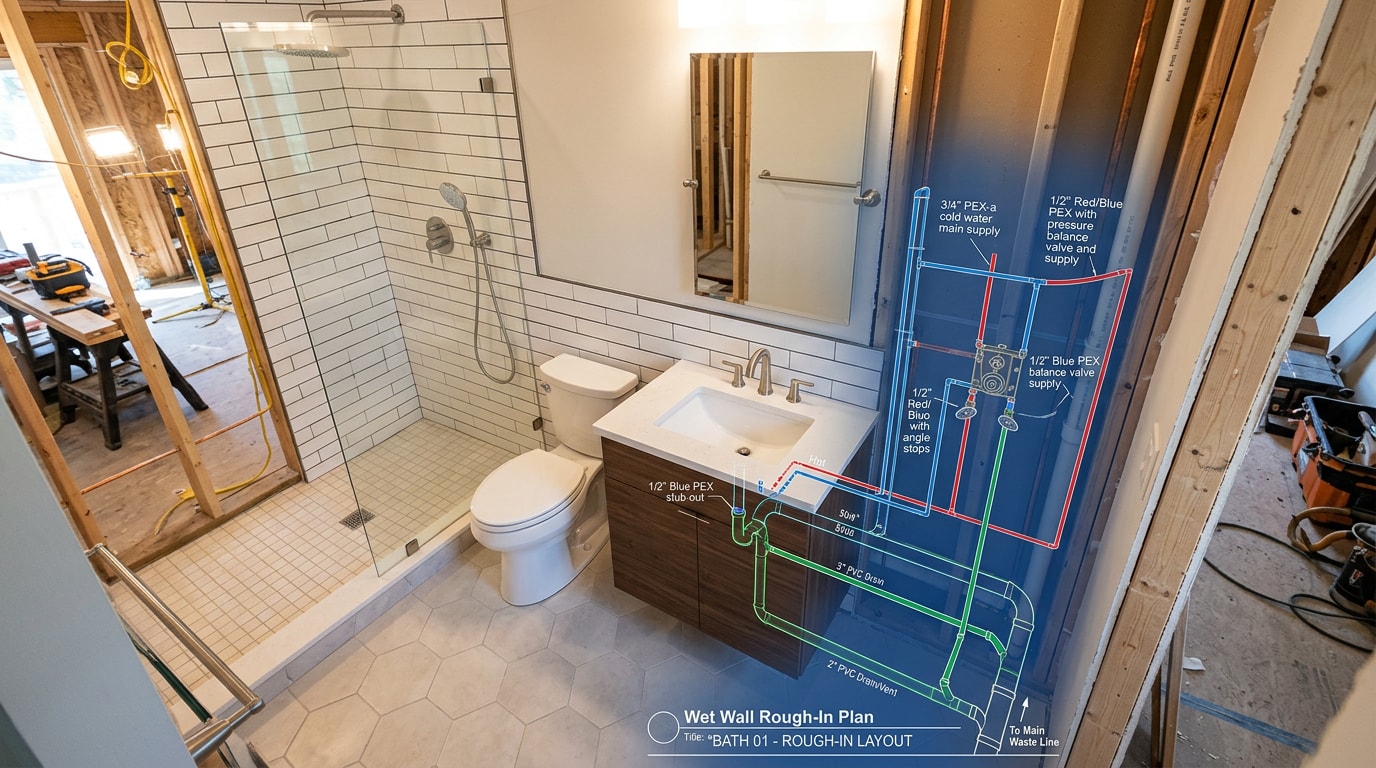
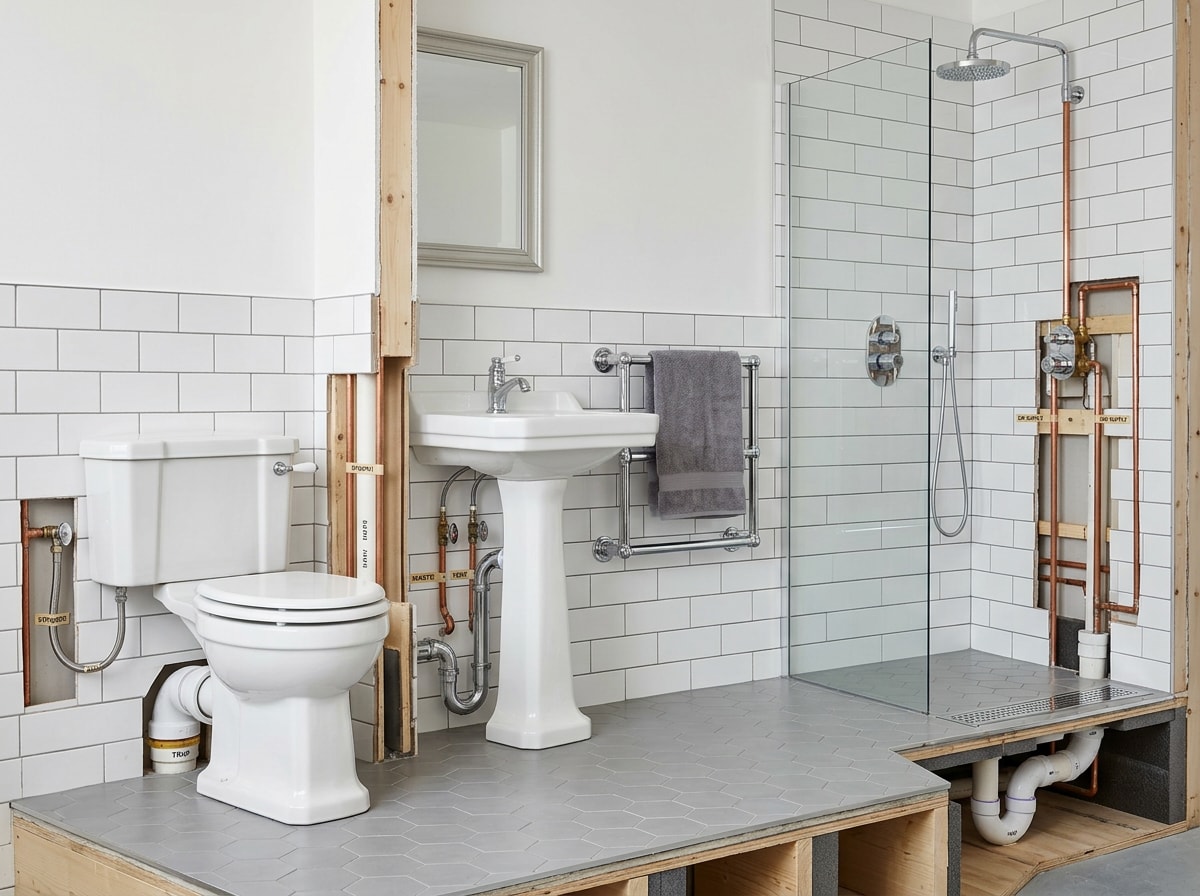
A bathroom plumbing diagram layers three systems on top of each other: water supply, drain-waste-vent (DWV), and the framing that has to physically hold both. Reading each layer separately makes the whole drawing easier to follow.
Water Supply Lines
Supply lines carry hot and cold water from the main line to the toilet, sink, tub, and shower. Most Sedona remodels now use PEX tubing instead of rigid copper, mainly because PEX resists freeze-cracking and installs faster around tight framing. Copper is still common in older homes and remains durable, though it costs more and needs soldered joints.
Hard water is a real factor here. Mineral buildup can shorten the service life of certain fittings over time, so a diagram should note which material runs where, since mixing copper and PEX requires the correct transition fittings to avoid corrosion. If your remodel includes a water softener or filtration upgrade, it's worth reviewing water treatment options at the same time, since that equipment usually ties into the same supply line you're already redrawing.
Drain, Waste & Vent (DWV) Lines
Once water is used, gravity does the rest of the work. Drain pipes slope slightly downward toward the main sewer line, and vents pull air into the system so water doesn't glug and sewer gas doesn't get pulled back into the room. Every fixture needs a trap, usually a P-trap, that holds a small water seal to block that gas.
A labeled DWV diagram shows how each fixture's drain ties into a branch line, then into the main stack running to the roof vent. This part is the most expensive to move once it's set, so it deserves the most scrutiny before demo day.
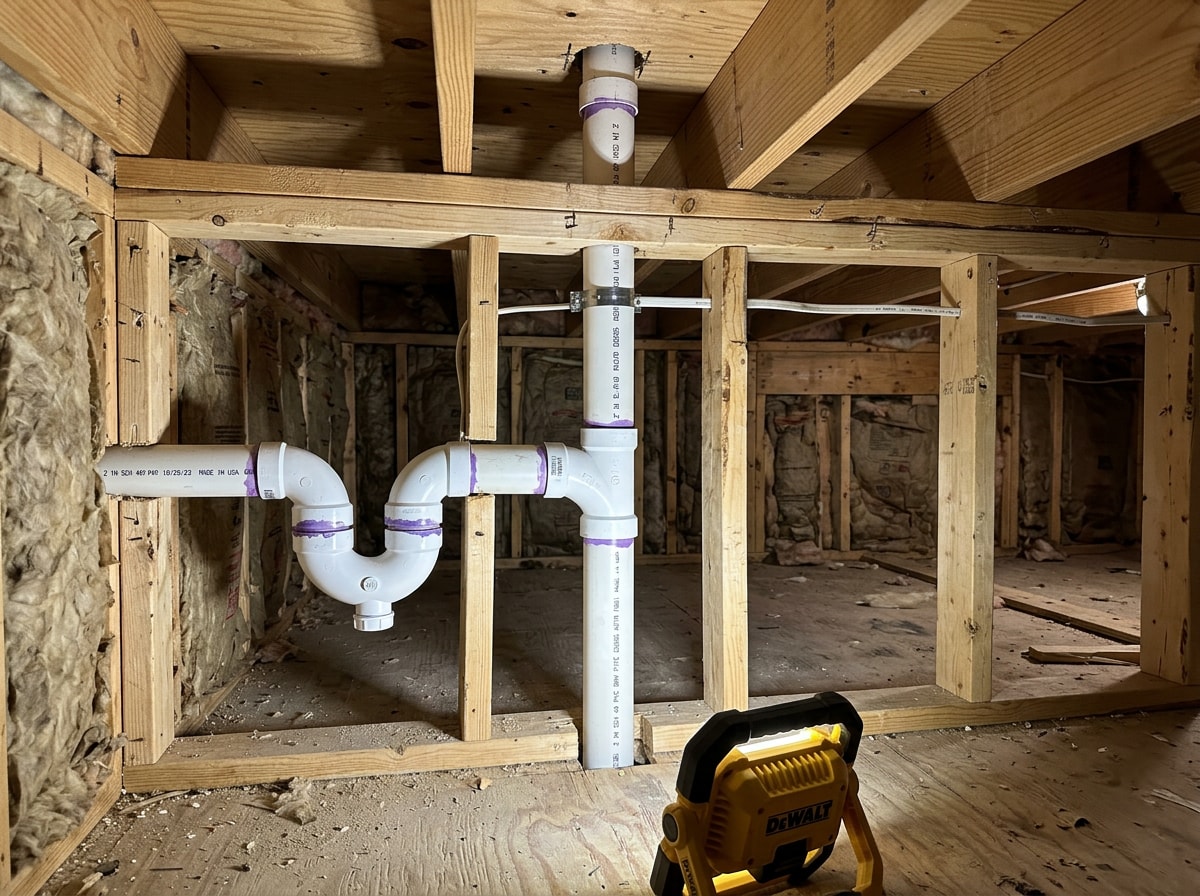
Framing, Floors & Collision Avoidance
Wet walls need to be thick enough to hold drain pipe, which runs larger in diameter than supply line. Floor joists present a similar problem: a drain crossing perpendicular to joists may need notching or drilling within code-allowed limits, and a good diagram flags where that's likely. Finished wall thickness and tile buildup also affect whether an old rough-in measurement still applies once the room is framed and tiled.
Toilet, Sink, Shower & Tub Connections
| Fixture | Drain Pipe Size | Trap | What to Watch |
|---|---|---|---|
| Toilet | 3 in. or 4 in. | Built-in trap at the closet flange | Flange height at or just above finished floor, or the seal fails |
| Sink/vanity | 1¼–1½ in. | P-trap | Supply connectors typically ⅜ in. flexible lines from shutoff valves |
| Shower | 2 in. | P-trap under the pan | Vent size depends on fixture load and drain run length |
| Bathtub | 1½–2 in. | Shared trap with overflow | Overflow ties into the same trap as the main drain |
Accessibility is worth planning for even in bathrooms with no current need for it. Comfortable clearances and accessible clearances overlap more than people expect, and the ADA's 2010 Standards for Accessible Design are a useful reference for seat height and side clearance if you're designing for aging in place.
How to Read or Draw Your Own Bathroom Plumbing Diagram
Diagrams generally come in three styles. A plan view (top-down) shows fixture placement like a floor plan and is the easiest for most homeowners to read. An isometric diagram shows pipe runs in three dimensions through walls and floors. A riser diagram tracks vertical pipe runs between floors, which matters most in multi-story homes.
If you want to sketch your own:
- Start with a scaled floor plan of the bathroom, even a rough one.
- Place each fixture with realistic clearances, since code minimums exist for a reason.
- Sketch the DWV path from each fixture back to the main stack, noting slope direction.
- Add supply lines last, since they're more flexible to route than drain lines.
This order mirrors how plumbers actually think through a layout. If your sketch raises questions about a trap arm length or vent placement before you've ordered fixtures, it's worth a quick call. You can get a free estimate and have a licensed plumber check the layout before cabinets or tile get purchased.
Popular Bathroom Layouts
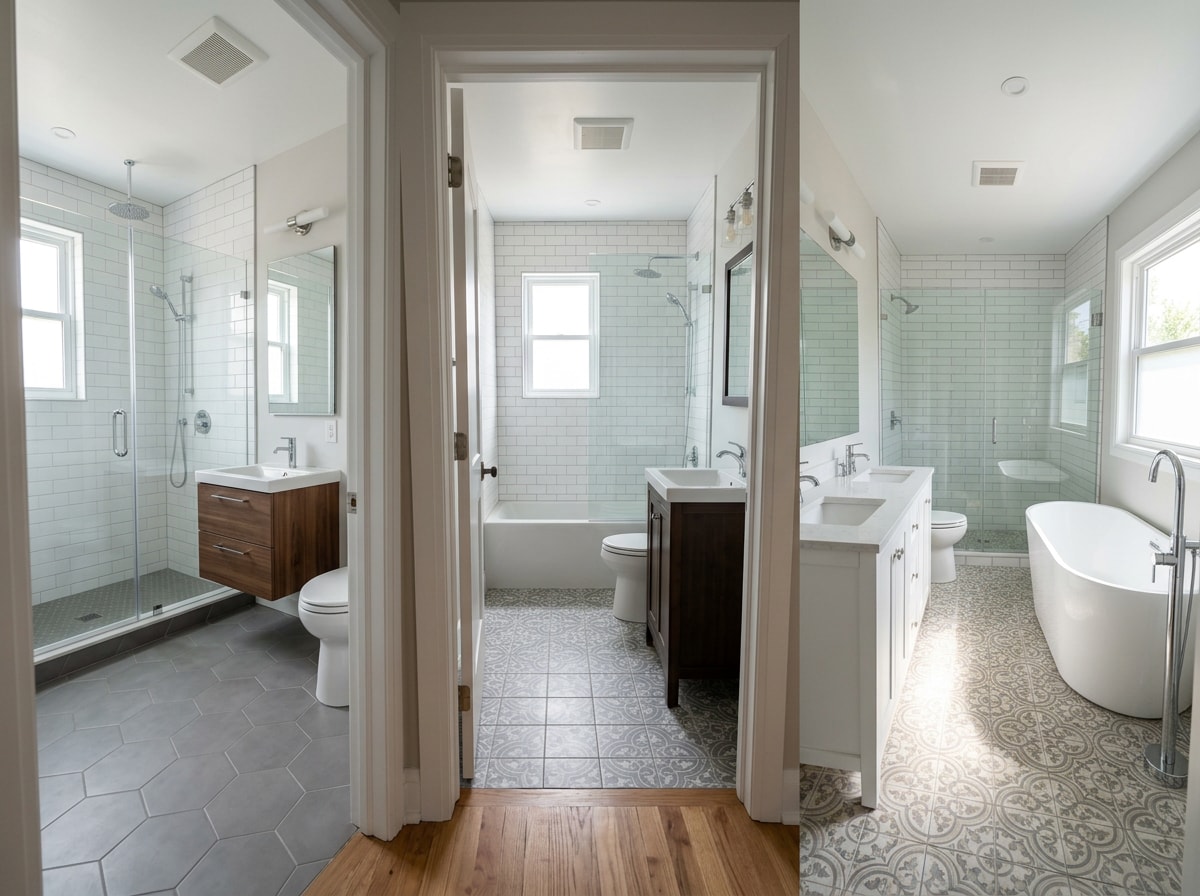
Most bathrooms fall into a handful of standard layouts, and knowing which one you're working with simplifies the rest of the diagram.
- Three-quarter bath (no tub): Toilet, sink, and shower stall. Common in secondary bathrooms, with lower plumbing costs since there's no tub drain or overflow to route.
- Full bath: Adds a tub or tub-shower combo, which needs a larger drain line and more careful clearance planning.
- Primary (versatile) bath: Separate shower and soaking tub, double sinks, sometimes a private toilet area. More fixtures means more branch lines feeding the main stack.
- Ensuite and small bathrooms: Compact fixture placement, frequently keeping everything on one wet wall to shorten pipe runs.
That single-wall approach, toilet, sink, and shower or tub sharing one wet wall, is usually the most budget-friendly layout for a remodel because it shortens both supply and drain runs. Spreading fixtures across multiple walls typically costs more in material and floor work. For broader planning help beyond plumbing, our residential plumbing services page covers what's involved in a full bathroom remodel.
DWV & Venting Rules Every Diagram Should Follow
A diagram that only shows fixture locations isn't finished. Sanitary tees and wye fittings direct waste flow in the correct direction and prevent backflow; using the wrong fitting at a junction is a common, easy-to-catch violation. Cleanouts, the accessible points where a clogged line can be snaked, should also appear on the diagram, usually at the base of the stack or at any significant direction change.
Drain slope matters more than most homeowners realize. Too flat, and waste won't clear the pipe; too steep, and liquid outruns solid waste and leaves it behind. A commonly cited target is about a quarter inch of fall per foot of pipe, though exact requirements vary by diameter and code version.
Trap arm length is another detail that trips up remodels. Code sets a maximum horizontal run for a trap arm based on pipe diameter, generally ranging from roughly 2.5 feet for a 1¼-inch line up to 10 feet for 4-inch and larger pipe. Exceed that distance and the fixture needs its own vent relocation, which is exactly the kind of thing a diagram should catch before a wall closes up. If an older line is already failing, our drain repair team can scope it before you finalize a layout.
Mistakes a Good Bathroom Plumbing Diagram Prevents
Diagrams catch problems that are easy to miss when working from memory. One pattern we see often in Sedona's older stock: a vanity gets widened or a sink gets shifted a few inches to fit a new cabinet, and nobody checks whether the existing trap arm is already near its maximum allowed run. The new sink position then needs a vent relocation that wasn't budgeted for, meaning a finished wall gets opened a second time after cabinets are already ordered.
Rough-ins measured from the wrong reference point cause similar headaches. A measurement taken from a stud instead of the finished wall surface can throw placement off by the combined thickness of drywall and tile. A diagram drawn against finished-surface measurements, and checked before fixtures are purchased, catches both problems for the cost of a tape measure and twenty minutes.
If you'd rather have someone verify the layout than guess, schedule a consultation before cabinets or fixtures are ordered. For homeowners weighing pipe material as part of the same remodel, our guide on PEX plumbing pipe in Sedona covers what to check before a repipe.
About the Author
This guide was reviewed by Dustin Elsea, a Prescott, AZ native and founder of Elsea Plumbing, with more than 30 years in the plumbing trade across Northern Arizona, including Sedona and the greater Verde Valley. Elsea Plumbing is a licensed, bonded, and insured contractor serving Sedona and the surrounding Yavapai County communities.
FAQ
What is a bathroom plumbing diagram?
A bathroom plumbing diagram is a drawing that maps how fixtures connect to a home's supply, drain, vent, trap, and valve systems. It shows pipe routing, fixture placement, and rough-in measurements so homeowners and contractors share the same reference before construction begins.
What is the standard toilet rough-in distance?
Twelve inches from the finished back wall to the center of the closet flange is the standard used in most modern construction. Some older homes, including older Sedona builds, were framed to a 10-inch rough-in, so always measure before assuming.
What pipe size is used for a toilet drain?
Toilet drains typically use 3-inch or 4-inch pipe, larger than other bathroom fixtures because toilets carry solid waste that needs more diameter to pass through without clogging.
What pipe size is used for a shower drain?
Shower drains commonly use 2-inch pipe. The drain ties into a P-trap just below the shower pan, and local code sets minimum trap and vent sizing based on that connection.
What's the golden rule for laying out a bathroom?
Always measure from finished surfaces, not framing studs, and respect minimum code clearances around every fixture. Measuring from an unfinished stud instead of the future wall surface is one of the most common rough-in mistakes.
Do I need a permit to change bathroom plumbing in Sedona, AZ?
In most cases, yes, especially if you're relocating a drain, vent, or supply line rather than just swapping a fixture in place. Because Sedona spans both Yavapai and Coconino counties, confirm requirements with the office that covers your specific address before work starts.
Ready to turn a sketch into a finished bathroom? Get a free estimate from Elsea Plumbing and have a licensed plumber walk through your layout before you order a single fixture.